This is a continuation of my greenhouse automation project.
In Step 1, I have
described how to built sensors’ box for measuring temperature and
humidity.
Now it is time for
actuators’ box. It is designed to control two solenoid valves: one valve is for filling water tank, and another valve for delivering water to the greenhouse. Like in the previous step the device will be connected to Domoticz server for remote monitoring and control. In case something wrong with network connection there are two buttons for manual switch ON/OFF of valves.
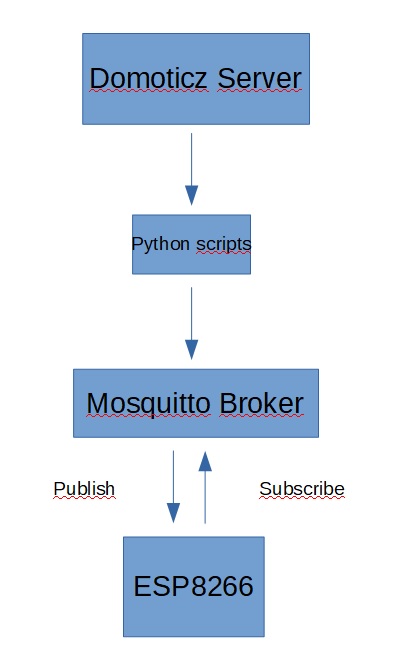
I use MQTT protocol for comunication between actuators' control box and Domoticz server.
If you don't familiar with MQTT, read this article.
The idea is that actuators' box is "subscribed" for messages with certain topics from the server. And my Domoticz server is "publishing" messages for switching valves. As soon as published "topic" corresponds to the topic my actuators' box is waiting for, the corresponding command ON or OFF is executed.
There is a diagram showing how the system works.
1. Hardware
As usual, let's start
from hardware we need for this project:
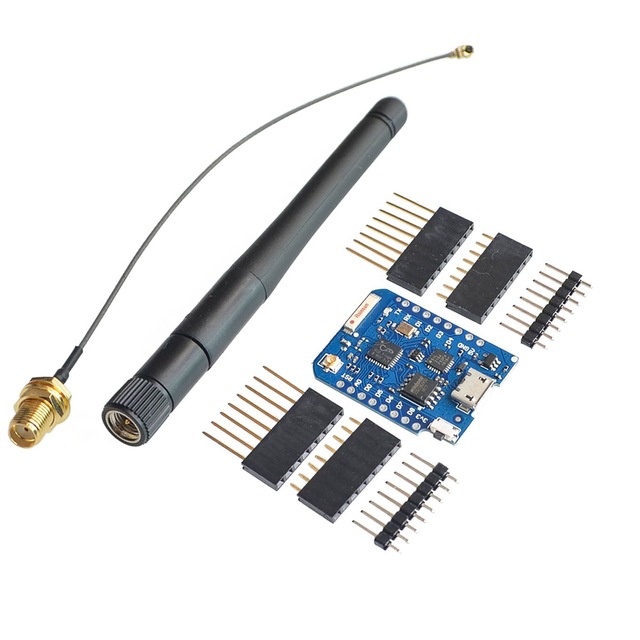
1. Wemos D1 mini
pro.
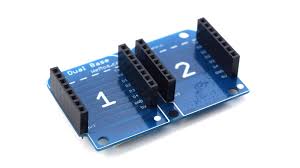
2. Wemos Dual Base
for D1 mini.
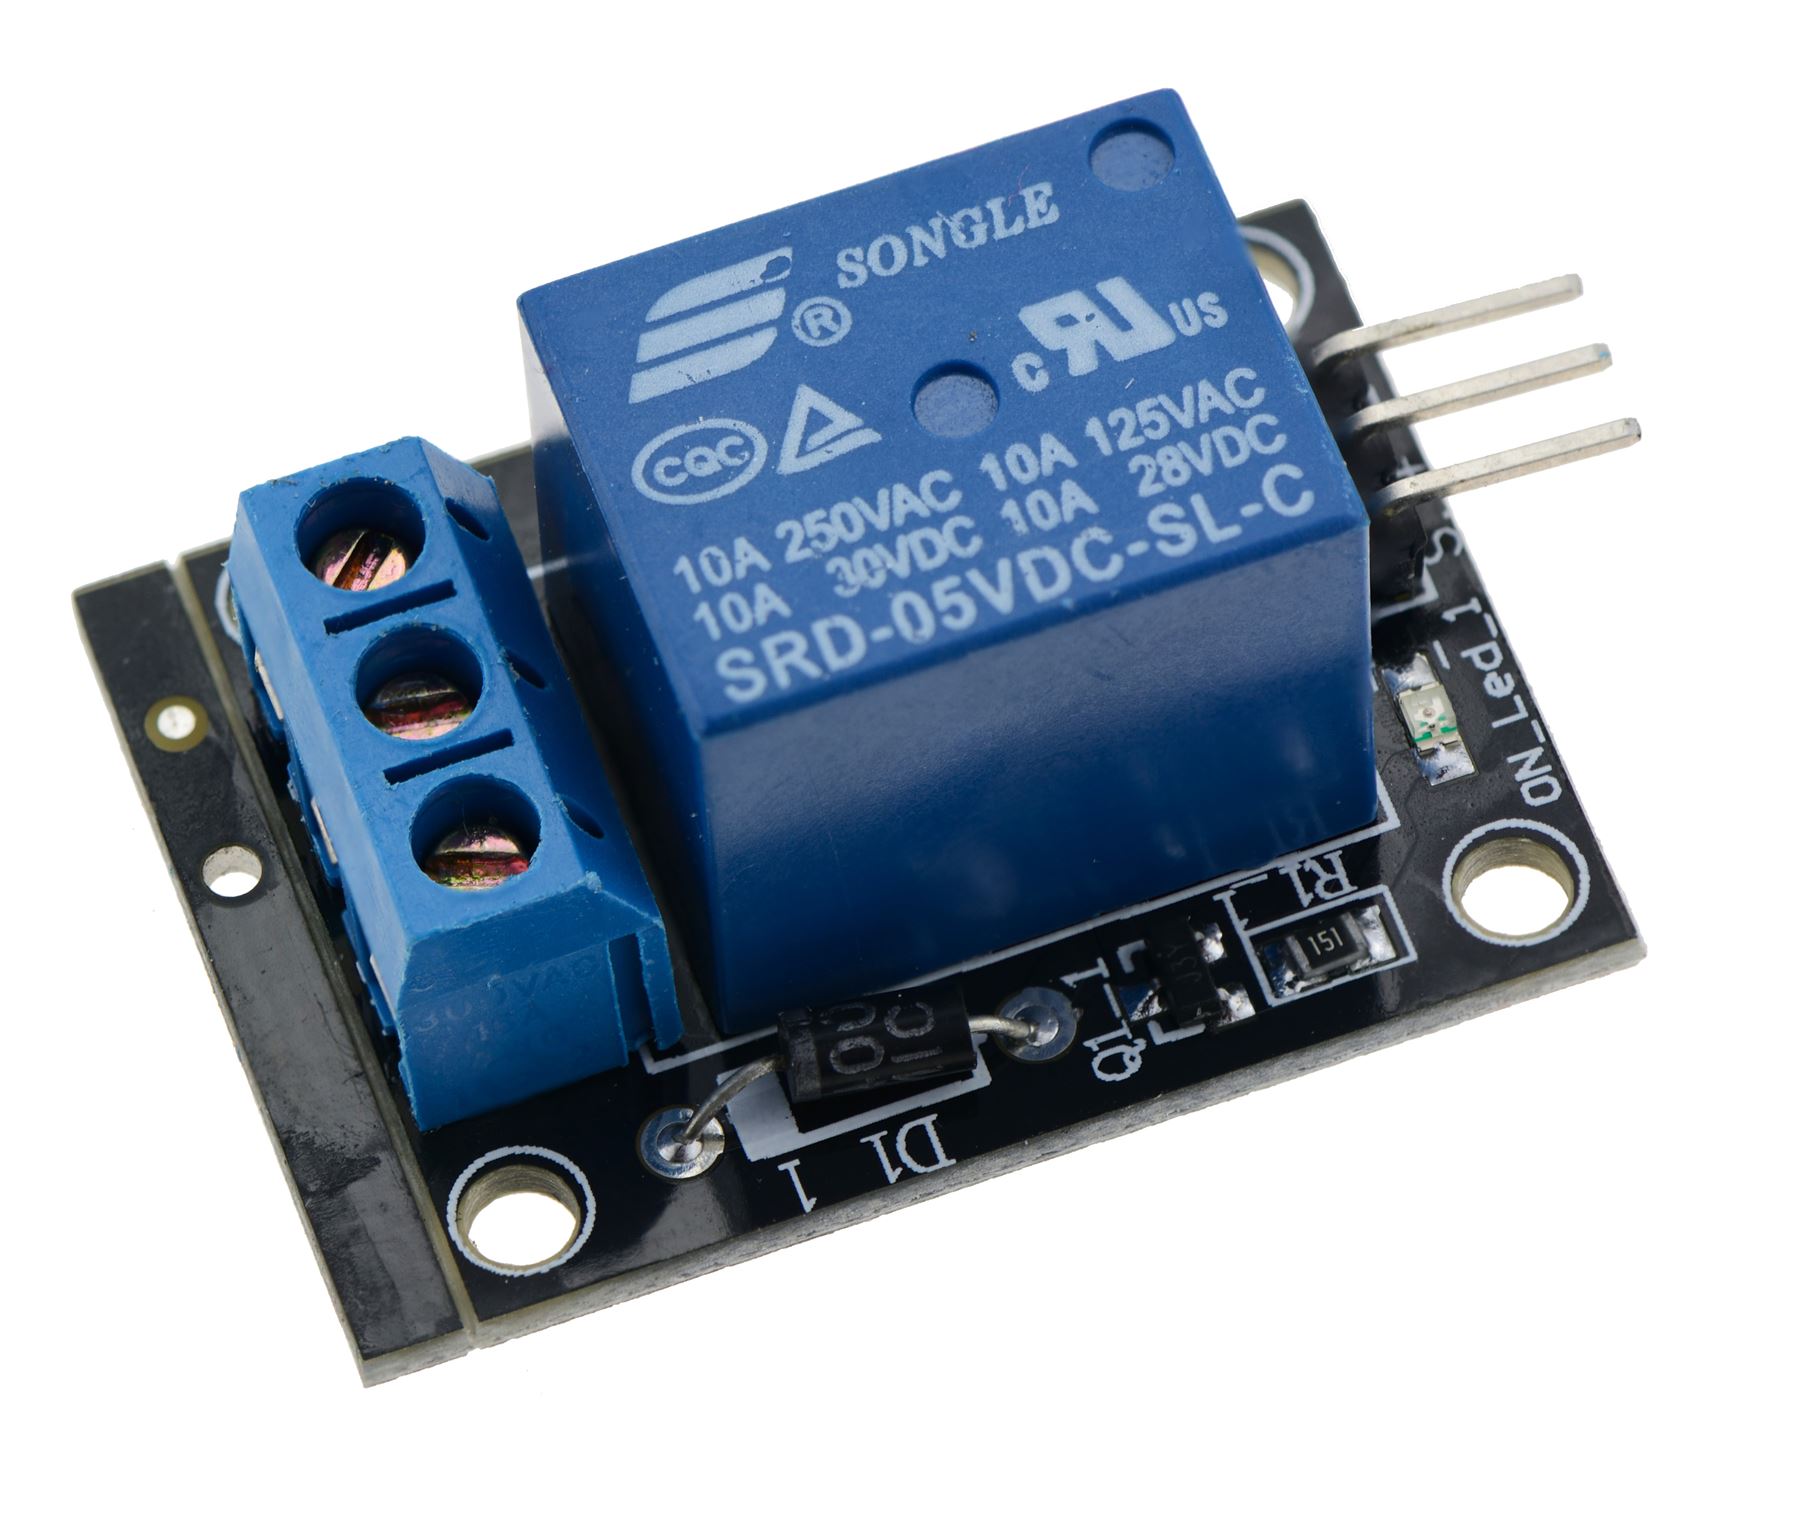
3. Wemos
relay shield. Just a
relay board. Wemos Relay board I have got, was defective, so I was
forced to use common relay board. You can try with Relay shield, may
be you will be more lucky.
4.
Wemos Proto Shield
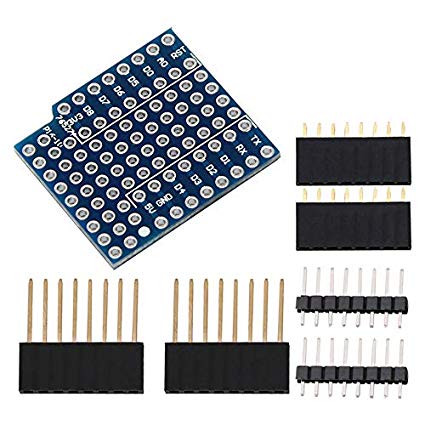
5.
DC – power board.
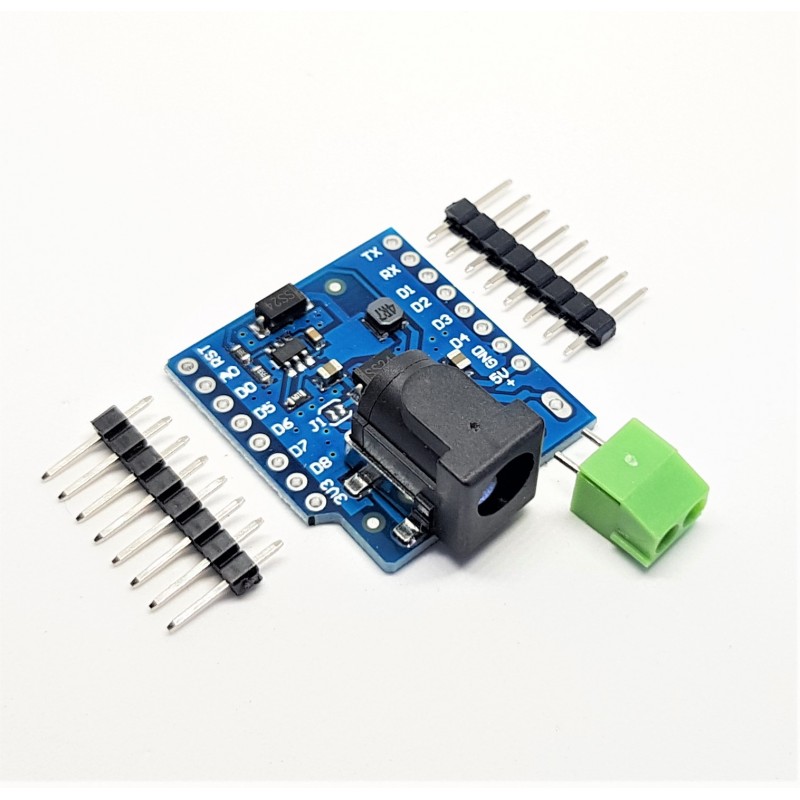
6.
LEDs – 3pc.
7.
Two ON-OFF buttons.
8. DuPont cables.
9. Two connectors.
10. Case.
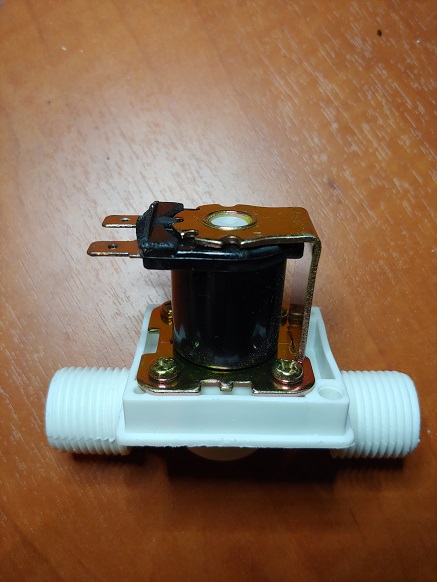
11. Two solenoid valves 12V DC.
Connect all parts like it is shown on the diagram below.
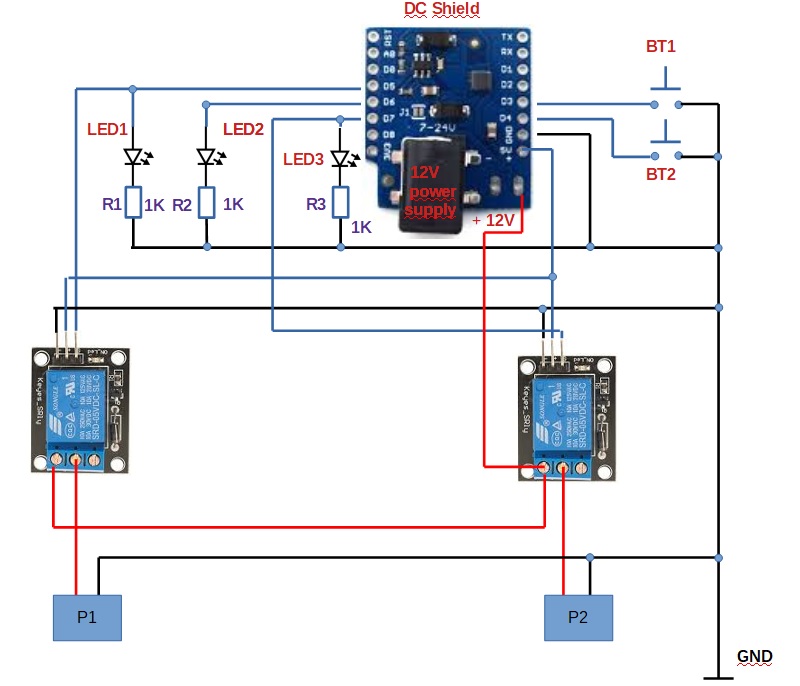
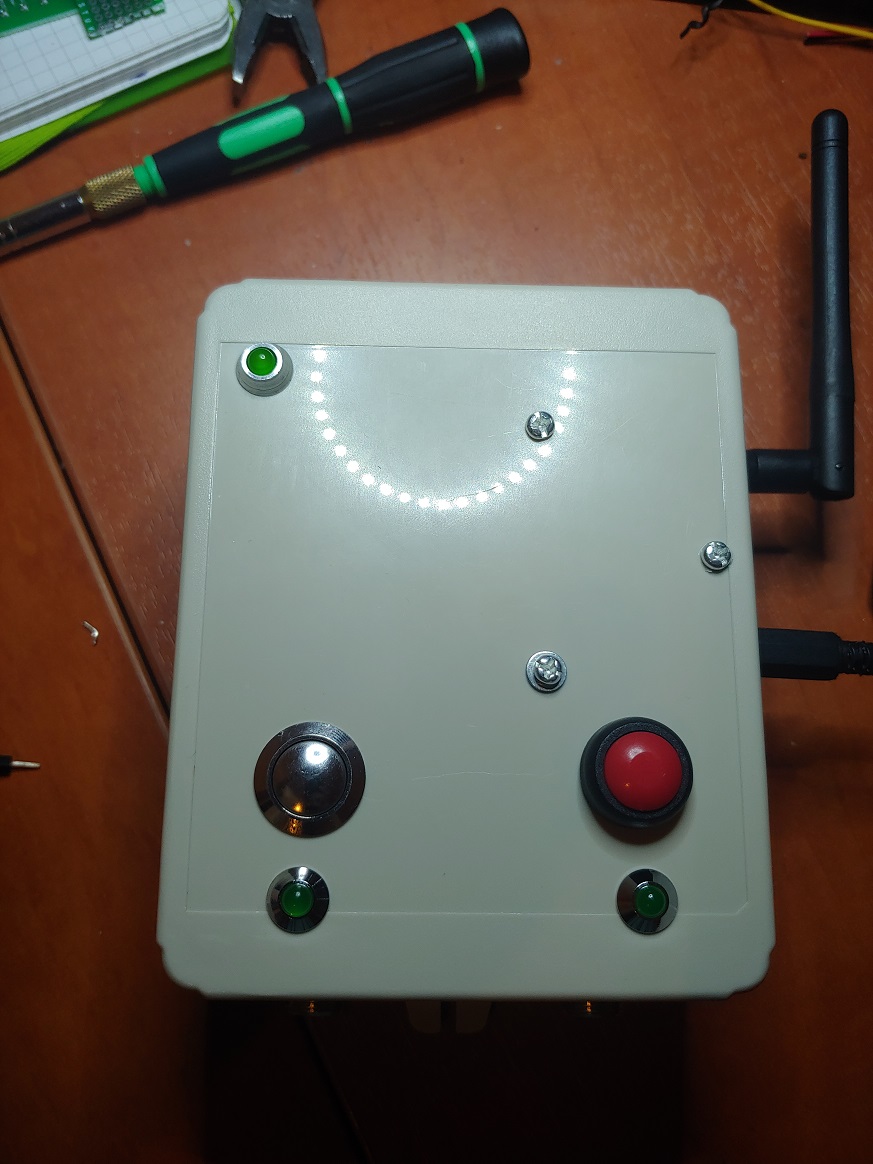
BT1 - Irrigation On/Off
BT2 - Filling of a water tank
LED1 - Filling of a water tank On/Off
LED2 - Status of the network connection. If it is green - the device is connected to local WiFi
LED3 - Irrigation On/Off
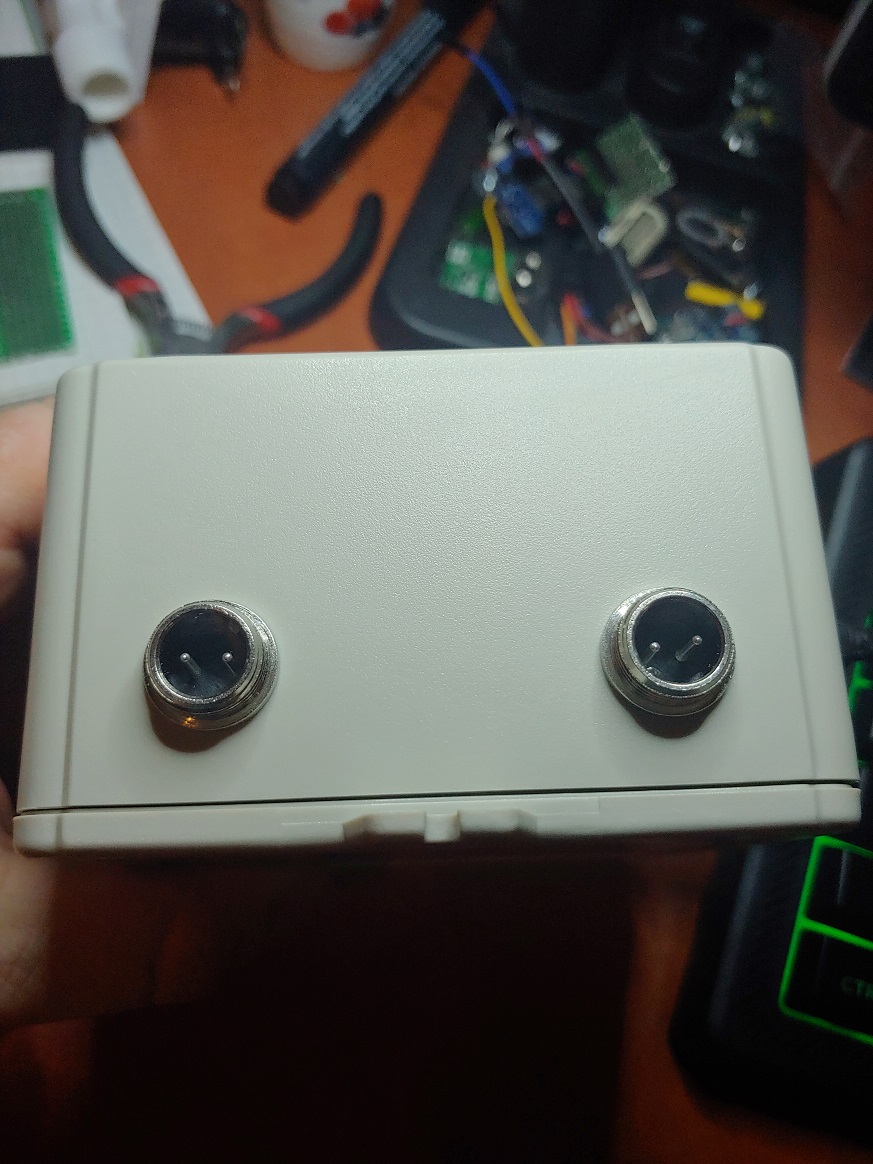
P1 - Connector for the valve for water tank
P2 - Connector for the irrigation valve
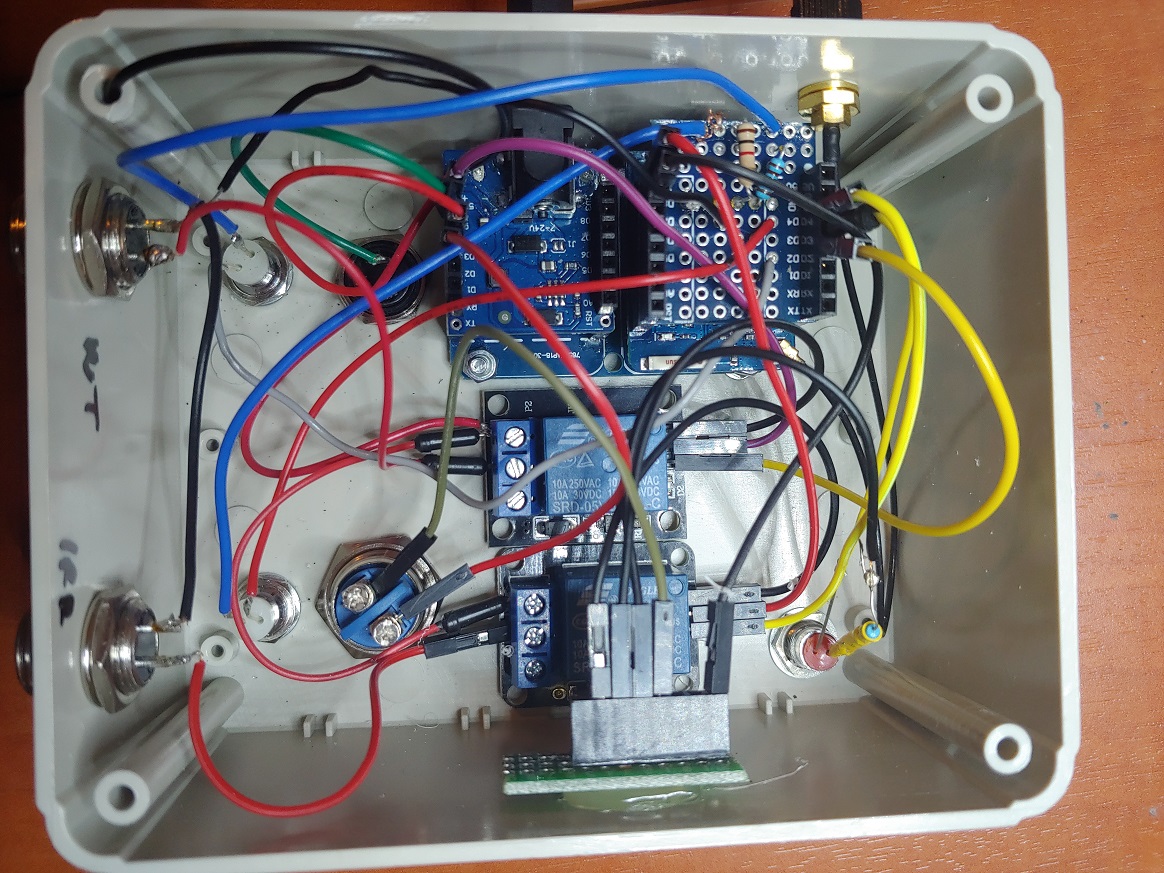
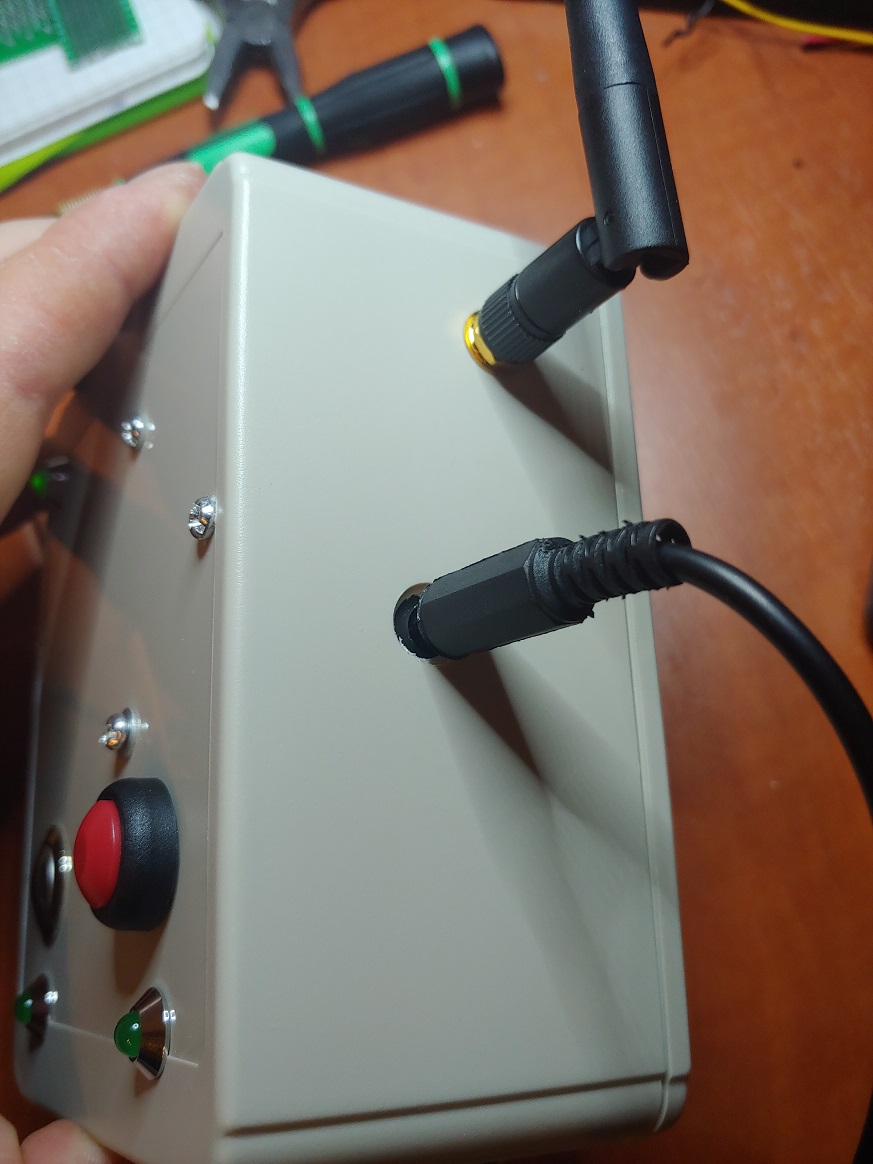
The device is powered with 12V DC wall power adaptor. The same 12V DC voltage goes to relays from Vin pin (to the right from power connector).
2. Software
All files for this project are stored here.
Prepare Raspberry Pi. I assume that Domoticz server is already running. If not - first install it. For Domoticz server you can also use a Windows machine if you want.
To use MQTT, you need a broker. We’ll be using Mosquitto broker installed on a Raspberry Pi. Read How to Install Mosquitto Broker on Raspberry Pi. We need Paho MQTT Client also. Look here for "Beginners Guide to The Paho MQTT Python Client".
Next you need 4 Python scripts to be placed on your server machine if it is on Windows:
filling_on.py - which switches on filling of a water tank
filling_off.py - accordingly switches off filling of a water tank
irrig_on.py - switches on irrigation in a greenhouse
irrig_off.py - switches off irrigation
Domoticz server can execute Python files directly on Windows.
If you are running Domoticz on Linux (Raspberry Pi), you need to add shell executable files. Those files have "sh" extention. Shell executable files serves as a bridge between Domoticz server and python scripts.
Domoticz server executes sh file and that file executes python script.
So, if you are on Linux, add 4 files accordingly:
filling_on.sh
filling_off.sh
irrig_on.sh
irrig_off.sh
* sh files mentioned here and shared on my bitbucket repository are only for reference. You need to change them a little bit.
To create sh file you can use any text editor. On Raspberry Pi of course the easiest way is to use nano.
Some readings about creating shell scripts could be found here.
The sh file will consists of 3 lines only:
#!/bin/bash
echo "Starting script"
sudo python3 /home/pi/Desktop/filling_off.py
Just change the third line by typing a path to your python script.
And do not forget to make all those files executable on Linux. It is easy. Just type in your terminal:
$ chmod +x filename.sh
No let's go to the firmware for Wemos D1 mini PRO.
I use Windows PC to program D1 mini.
To
upload a firmware you
need esptool to be installed on your PC. There are many tutorials how
to do this on the internet. For instance you can use this one.
First you need to
erase flash. Open command promt and type:
python esptool.exe
--port COM5 erase_flash
Of
course you need to use correct number for COM port. In my case it was
COM5.
As
soon as you have erased flash, upload firmware: python
esptool.exe -p COM5 write_flash -fs 4MB 0 C:\path_to_firmware
(I will leave firmware I used on bitbucket). You
can download newest firmware here.
Next, upload two python files:
main.py - the main script
umqqttsimple.py - mqtt library for ESP8266
You need to modify main.py file. Put there your WiFi credentials, IP address of mqqtt broker, IDX numbers of your devices on Domoticz server. I will describe how configure Domoticz server later on.
To upload files you can use Ampy.
In command line type: ampy --port COM5 put C:\path to your file
Use appropriate number of COM port.
Recently I found another quite convenient way of programming ESP - uPyloader software. It has nice GUI, works quite well.
3. Domoticz setup
Create two switches via Domoticz GUI.
1. Go to Setup tab, choose Hardware. Create new hardware by entering a name and type.
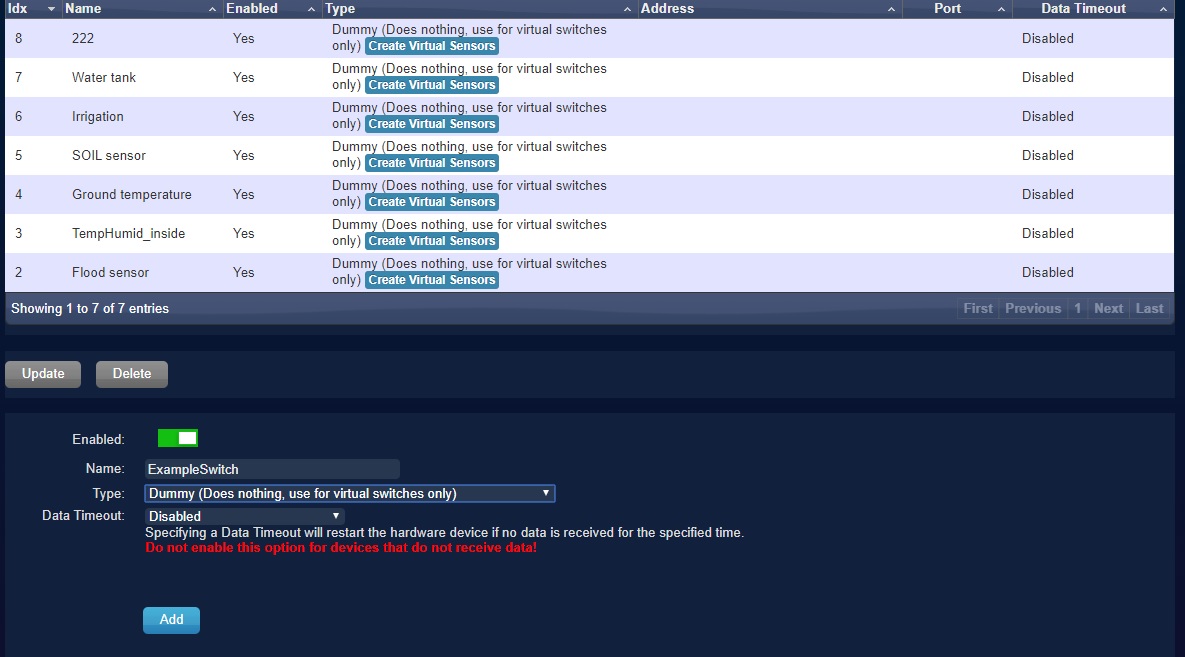
Finish by clicking "Add".
Your new hardware will appear in the list above.
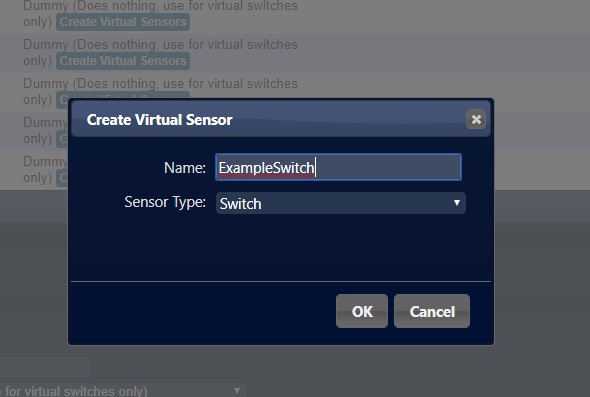
Next, click "Create virtual sensor". In the pop up window enter a name and type.
To see the devices list, click on SETUP tab and then select DEVICES.
Please note IDX number of your device. You will need it in your Python script to address data to virtual sensors.
Now you should find your switch under Switches tab.
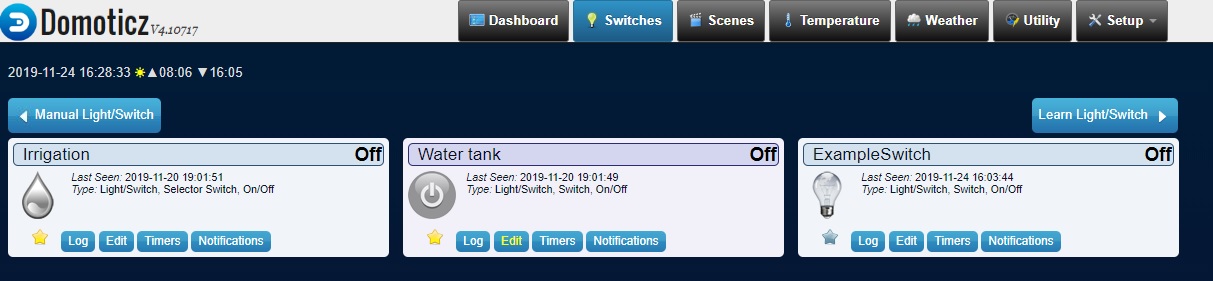
Now you need to "adjust" your switch. Push "edit" button on your switch tab.
Assign a name, choose type of your switch. You can also choose an icon.
Specify paths to sh files.
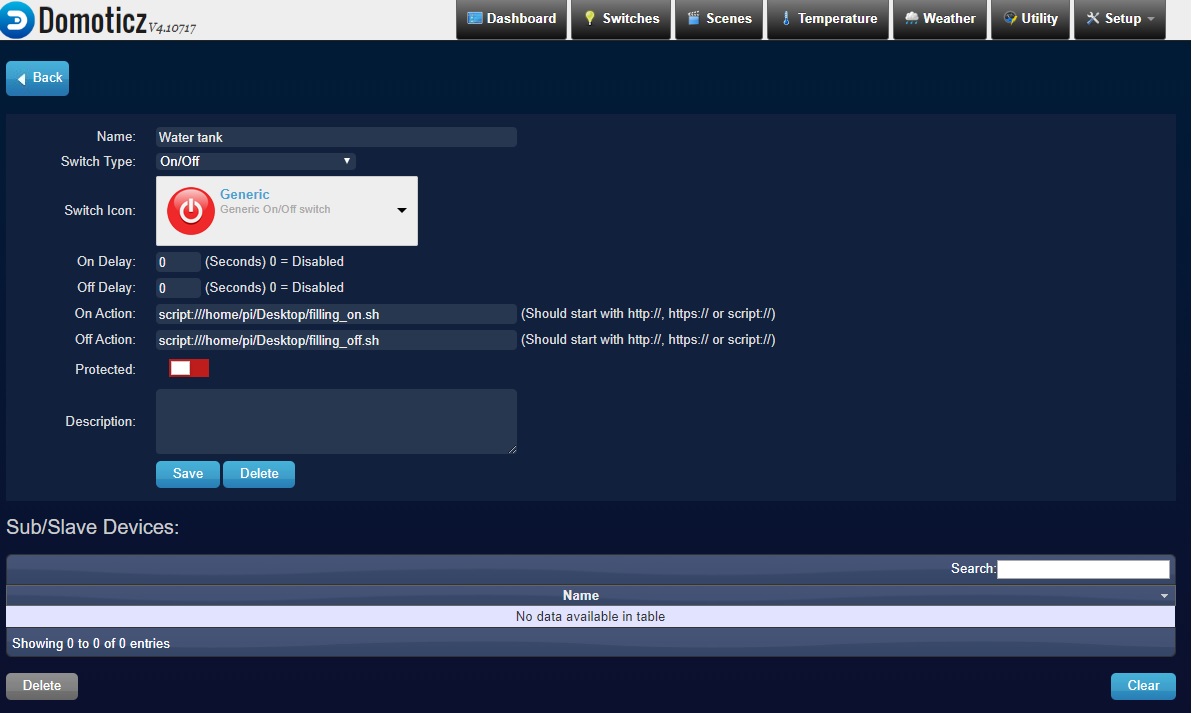
Save it.
That's it.
Now if you press your virtual switch, you will hear relay "click" and the valve will open.
Results
Unfortunately, the project was completed in late autumn, and it was no longer possible to test the device in the greenhouse.
The device was tested in laboratory and it works:
after pressing the hardware button or virtual switch, corresponding valve is activated.
I will mount it in my greenhouse in spring to see how it works in real conditions.
What I would like to add to this device, is automatic control of the water level in the water tank.
It would be nice to have a feedback from hardware buttons to the server in case button is pressed, also. Now, if the hardware button is pressed and the valve is switched on/off, it is not visible on the Domoticz dashboard.
As a next step of automating my greenhouse, I plan to create a safety system that will monitor all other components for proper operation: valves, fans, power supply and so on.